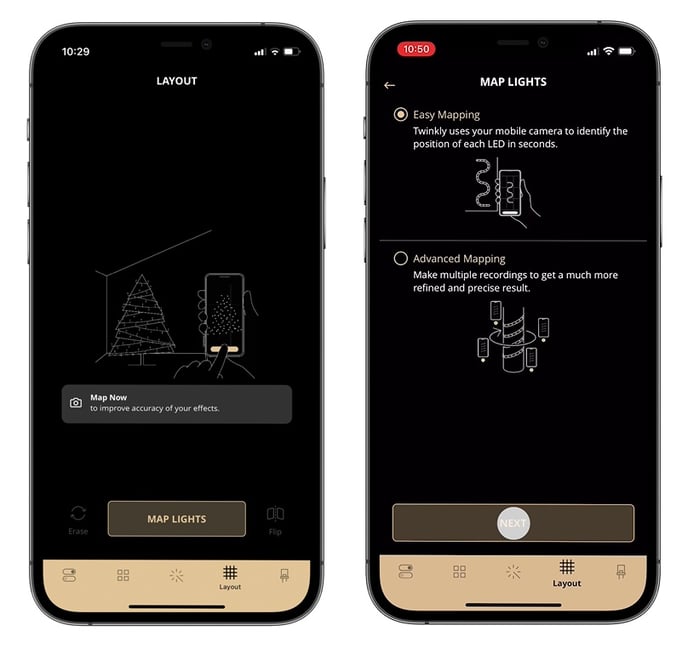
Step by step procedure for mapping your Twinkly devices.
Applies to Twinkly Generation I and Generation II devices, Twinkly PRO and Twinkly Plus.
What is mapping?
Mapping is where the Twinkly App uses your smartphone camera to scan each LED bulb in your space, creating an advanced 3D virtual layout of your lights. No matter where you’ve placed your lights, the app will find them.
Choosing a mapping type
Go to the Layout section of the app menu, give the app access to your phone’s camera, and choose whether you want to use the Easy Mapping or Advanced Mapping feature. Just make sure your device is online!
Some options may depend on the Twinkly device you’re using (e.g. Flex is ; on your smartphone’s/tablet’s operating system (iOS/Android); and on your device’s connection status (Twinkly direct connection/home Wi-Fi connection).

Easy Mapping (2D)
This kind of mapping is recommended for installations where the lights are mostly on a single surface.
The algorithm will automatically identify the position of the LEDs located on the sides and back of the holder, estimating their position.
Start the process by clicking on “Mapping” and selecting “Easy Mapping”: the LEDs will start flashing quickly and the magic begins!
The mapping ends when the LEDs are on a fixed color. It’s possible to save or repeat the operation.
In case of poor results, a pop-up will indicate the “Poor results” condition and it’s possible to repeat the operation.
During the mapping process, it is possible to select the wide camera (this option is only available for Easy Mapping)
Advanced Mapping (3D)
This mapping mode allows you to make a larger number of scans, resulting in an even more accurate layout.
This innovative method of mapping LEDs allows you to scan the different sections of your installation an unlimited number of times, for a perfect, 360 ° rendering.
During the mapping process the LEDs will appear in 4 different colors, based on their status:
-
RED: they don’t still have space coordinates.
-
ORANGE: the LEDs are recognized for the first time by the camera (XY coordinates)
-
YELLOW: the LEDs are recognized for the second time by the camera.
-
GREEN: the LEDs are completely recognized and in a three-dimensional way (depth coordinates)
Following the steps proposed by the app, at each step scan your installation by moving the camera angle (during each scan it is necessary to remain as stable as possible with your phone or tablet)
When all the LEDs are green, it means that the entire installation has been properly mapped.
Congrats! Your lights have been mapped and the app will show you your actual Layout.
You can choose to keep it or try again.
For the AWW the color of the LEDs will change from warm, when not mapped, to cool when mapped, becoming cooler while the mapping is proceeding further.
Important notes:
- If you wish to redo the mapping procedure and get a new layout, simply click on "Restore" (iOS) or “Erase” (Android).
- You can restore one of the last 3 layouts using the Layout History feature (iOS only)
- On devices with the iOS operating system you can map with the horizontal camera, you just have to enable rotation (of the phone camera)
- There are some useful tricks to get the best results from the Mapping procedure. Read this article to learn more.
- To create an effect in 'Drawing mode' LEDS mapping is required (except for Line and Flex which have a linear design)
Not found what you were looking for? Contact us.
